Whether you have an Android or iPhone, taking food photos and editing them through your smartphone has never been more of a breeze! Edit photos to look professional with these apps for food photography.
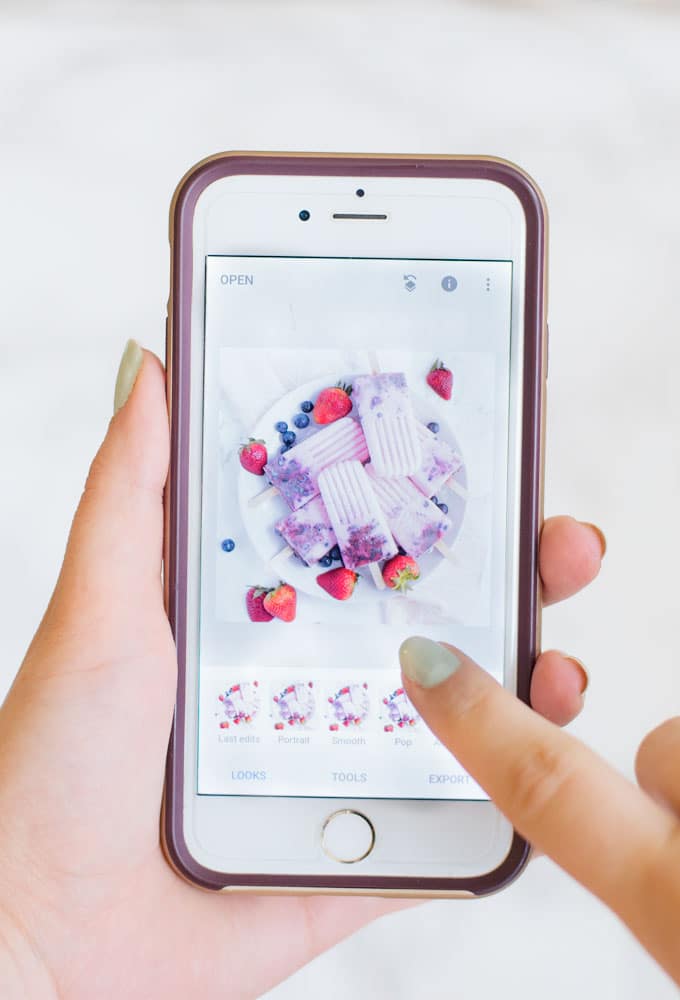
I normally use my DSLR for all my pictures on my blog and edit everything in Photoshop, but sometimes I want to take a picture on my phone and edit em right then and there!
I personally have an iPhone and I believe it is a powerful camera. With a few editing apps, I can get my food photos to look mouthwatering, professional, and Insta-ready!
1. Snapseed
Snapseed is available on both Android and iPhone and I love some of the powerful editing features it provides. I don’t use any of the filters (I use another App for that which I will get to)
Favorite features:
- Healing Tool – Great for removing objects or cleaning up a photo
- Open a photo in Snapseed and under the tools section, select “Healing”
- You can zoom in by pinching your fingers and simply swipe a section you want to remove an object from sometimes the tool doesn’t work perfectly but you can easily undo!
- Once you are satisfied, save the photo to your camera roll
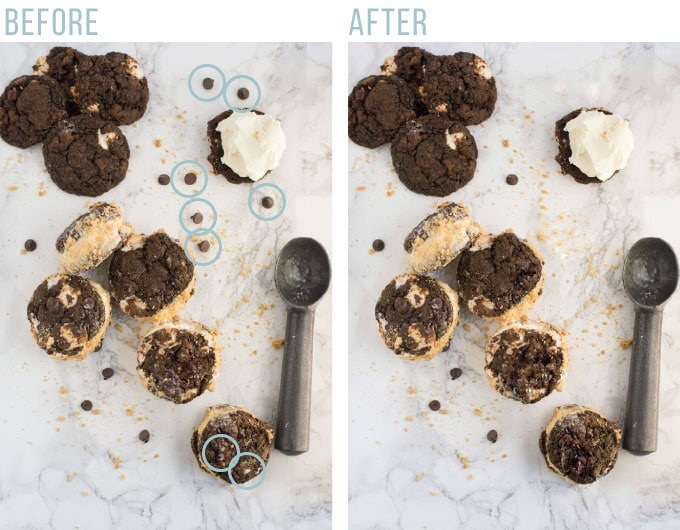
In this example, I removed some of the chocolate chips as well as the ice cream spots on top of the cookies:
2. Selective Brightness: Great for brightening up a portion of a photo
- Open a photo in Snapseed and under the tools section, select “Selective”
- Tap a part of the photo you’d like to brighten and a circle with a “B” should appear
- At the top of the screen where it says “Brightness” you can adjust by dragging your finger right or left
Additional Tips:
- You can add multiple brightness points on a single photo!
- You can also select how wide the radius of the circle is my pinching your fingers in or out. The radius will be in red as shown below
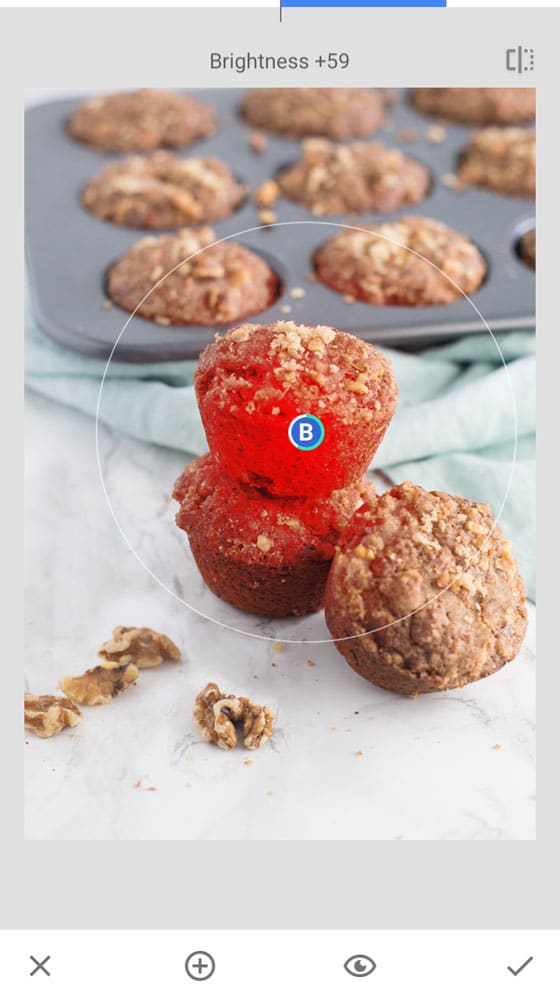
In this example, I brightened the front muffins only
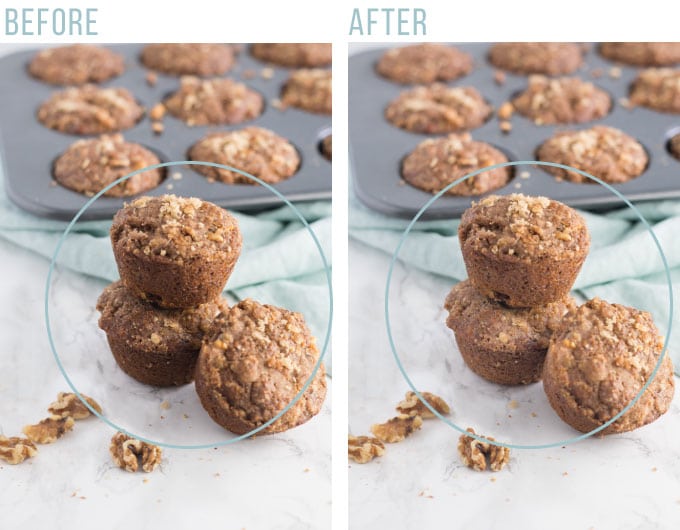
Overall, I think the App provides great tools for editing photos but the adjustments can be finicky (like zooming in, pinching sections, etc). My best advice is to play around with it until you feel comfortable!
2. Photoshop Express
I use Photoshop to edit all my photos in RAW and the PS Express App is not only free to use BUT it provides all the RAW photo adjustments and has a pretty excellent auto-edit feature!
I use this App to make overall edits to my pictures.
Steps:
- Open photo in PS Express App
- Under tools (the icon with the three bars) you can adjust exposure, contrast, highlights, clarity, dehaze, and more!
- With an adjustment selected, such as exposure, select the wand at the top and it will auto adjust for you. You can then adjust the auto setting by sliding the adjustment bar from left to right
Tips:
- I typically adjust the exposure, contrast, whites, temperature, clarity, and dehaze. Feel free to play around with all the features at first to get a hang of what they do and what works for your style!
- Be careful not to overdo it with the editing. A light touch is key to making a great photo!
- You can see before and after preview by selecting the rectangle icon next to the wand on the top menu
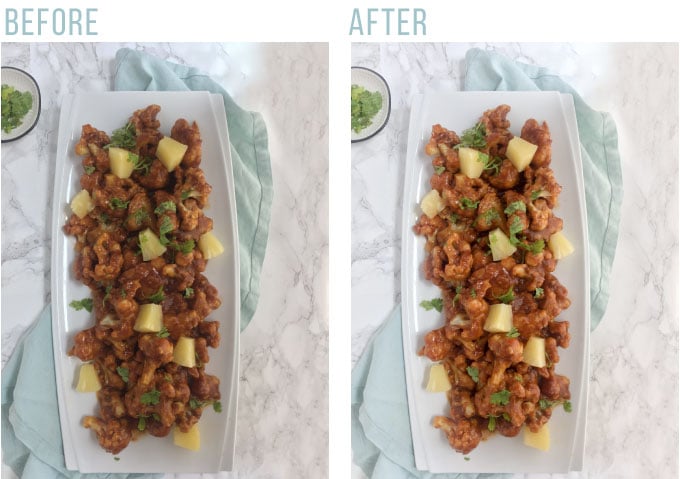
In this example, I adjusted exposure, contrast, whites, temperature, clarity, and dehaze:
3. VSCO
VSCO is the best for filters. They have an overwhelming selection of filters but they are by far the best is the game!
My style tends to be clean, bright photos. I ended up purchasing VSCO filters S1, S2, S3 to fit my style. Once I am satisfied with editing my photos in Photoshop Express or Snapseed, I take it into VSCO and apply a filter. Voila! Image is Instagram ready.
Steps:
- Open photo in VSCO App
- Select filter
- Adjust level of filter by sliding the adjustment bar from left to right
Tips:
- Find a filter/filters that identify with YOUR photography style and stick to it! This is the key to having a cohesive Instagram feed or blog photos
- You can find inspiration on Pinterest for VSCO filters
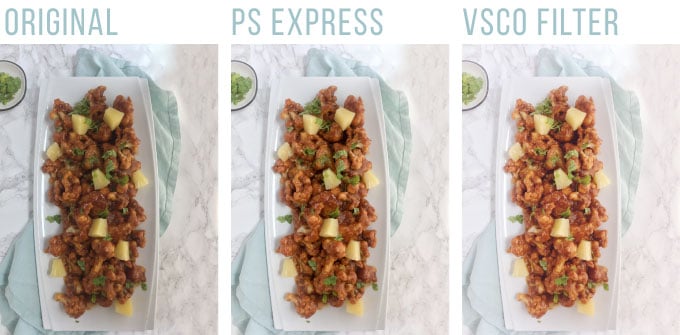
In this example below, I took the photo from above with the PS Express edits and applied VSCO filter S1 at 12+
Recap:
Snapseed: Great for selective editing
Photoshop Express: Great for overall editing
VSCO: Great for filters
Now editing can only take your photos so far! Make sure to take pictures in natural lighting. You can see my post on how to make a lightbox too!
Related:
How to Make a Photography Light Box
3 Best Angles for Food Photography
Color Theory for Food Photography
My Top 2 Camera Lens for Food Photography
What’s your favorite photo editing app for food photography? Let me know in the comments below!

Thank you for this wealth of information! Not only is it very helpful, but it is written in a way that is succinct and easy to understand. I just downloaded Snapseed based on what you wrote about it, and so far I love it! I now have an easy, quick, and user-friendly way to make the photos for my food blog look professional without all the professional equipment and costs. You have really helped me, thank you!
Glad to hear Christy! LOVE Snapseed!
Great post! I own a DSLR and I still use my iPhone 95% of the time 🙂
Your phone is a powerful tool! It’s a great resource in a pinch.
Thank you, this is very useful information for me, I am going to use it soon!
You’re welcome!
Some great tips! Typically I edit everything in Lightroom but this was useful. Especially since food photography isn’t my main passion.
Yes, I don’t always use apps, but I find them useful at times!