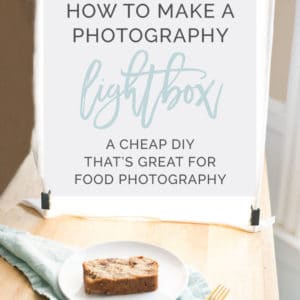
Let’s face it, lighting equipment can be so expensive but it doesn’t have to be! This post will show you how to DIY a photography lightbox for around $30 step by step!
This post was originally published in June 2018. More information has been added to the post!
Lighting is one of the most important elements when it comes to food photography. There are two types of lighting:
Natural
- Pros:
- Makes photos look beautiful
- It’s FREE
- Food can look more natural
- Cons:
- Have to take photos at a certain time of day
- Can be challenging during winter when there’s less light
Artificial
- Pros:
- Easy to control
- Cons:
- Can be a big investment (not in this case though!)
My favorite is… a combination of both! I like to shoot in the daylight in addition to using this lightbox.
I’m sure you hear photographers and bloggers stress the importance of natural lighting, but lightboxes can work wonders for your food photos!
You can also check out all my photography equipment here including other artificial lights I use!
What is a photography lightbox?
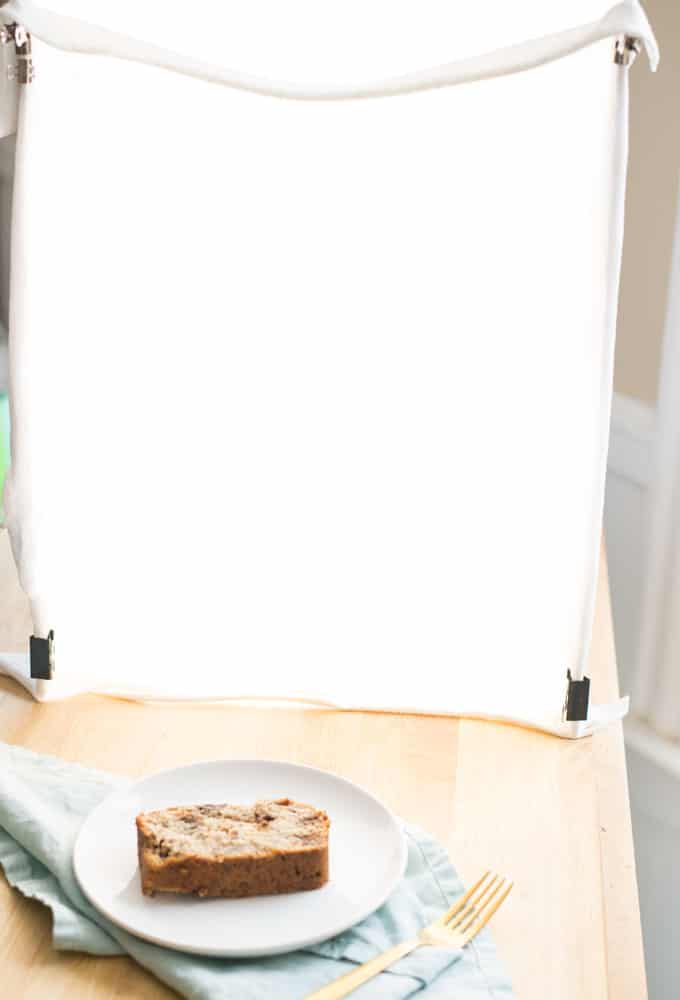
A photography lightbox is exactly what it sounds like, a box of light! The light source is placed near your food subject to produce some stunning photos. When the weather isn’t great, or the daylight isn’t optimal, a lightbox is your friend!
What light bulbs are used for a photography lightbox?
When making a lightbox, it’s important to use daylight light bulbs. The standard lightbulbs used in a house are incandescent and they give a warm, yellow color to the room. This is not great for photography as it adds a yellow-ish hue to your photos!
Daylight light bulbs produce a cooler, but also harsher light. That’s why we use a diffuser to soften the light.
How to make a photography lightbox:
Supplies:
- (2) 22”x28” foam boards ($4 each from a craft store)
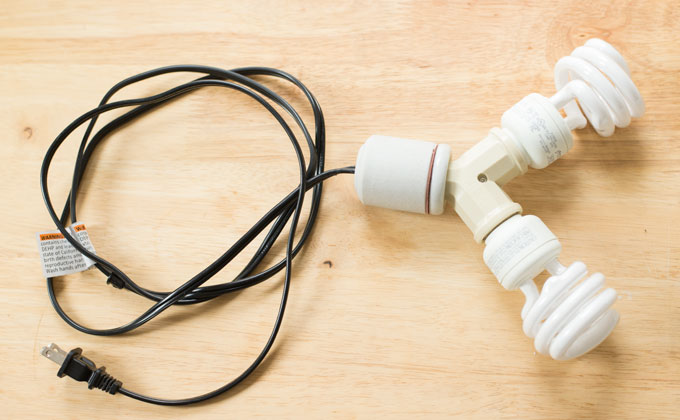
- 2 daylight light bulbs ($4 a piece)
- hanging light bulb cord ($7)
- light bulb socket splitter ($3.50)
- XL plain white t-shirt ($5 from a craft store)
- binder clips
- packing tape
- Xacto knife
TOTAL COST: $31.50
Instructions:
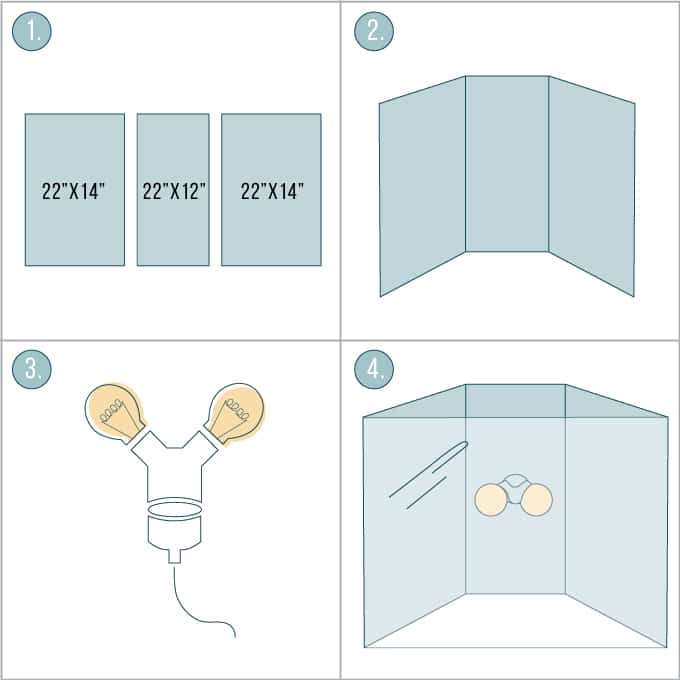
- Cut 1 piece of foam board in half. Cut a 22”x12” piece off the second foam board. You should now have (2) 22”x14” pieces and (1) 22”x12” piece. (fig. 1)
- On the smaller piece, trace a circle the size of the lamp. Cut out using the Xacto knife.
- Tape the three pieces of foam board together, have the smallest one in the center. (fig. 2)
- Insert hanging light bulb cord through the hole. Secure the back with packing tape.
- Screw in light bulb splitter and light bulbs. (fig. 3)
- Cut a large square out of the t-shirt.
- Using binder clips, clip t-shirt on front. (fig. 4)
If making your own lightbox isn’t your thing (which I believe it is if I still have your attention!) you can purchase one from Amazon like this.
How to use a photography lightbox
Now that you have a lightbox, how the heck can you use it for food photography?
There are a couple of different configurations:
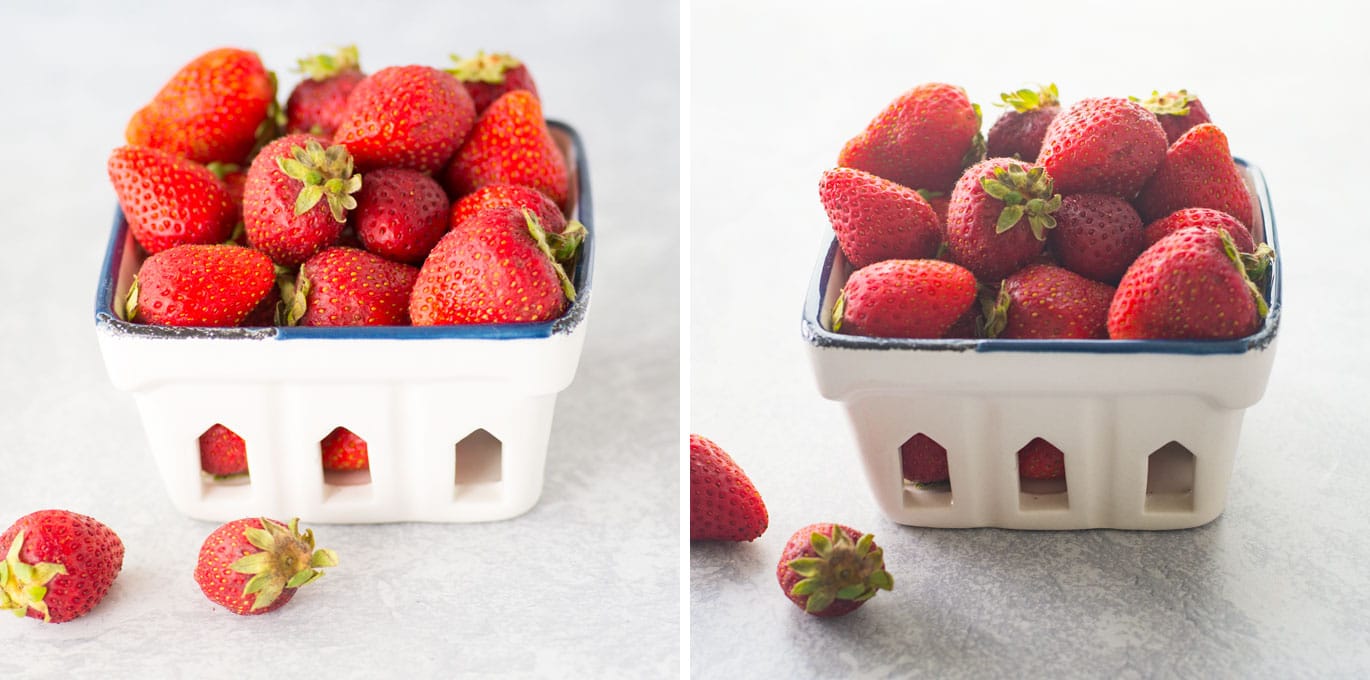
Backlit Method (strawberries on the right) – the lightbox is behind the subject.
Sidelit Method (strawberries on the left) – the lightbox is on the side of the subject
Both yield in very different results!
Check out the video of how to make a light box!
Please note this post may contain affiliate links which do not impact the cost to you but gives me a small commission. Thank you for your support!
Related:
My Food Photography Equipment
3 Best Angles for Food Photography
Color Theory for Food Photography
Easy DIY Food Photography Backgrounds
What do you think of this DIY photography lightbox? Let me know in the comments below!
A very useful topic, many people who like to take photos will be grateful to you!
Thanks so much, Judith!
Is there a way to make this in a smaller version? It looks a little large for me to use on my table top.
Yes! I would just change the dimensions of the foam board to fit your needs. All the light equipment should stay the same.
I’ve always wondered about this. Thanks for sharing!
You’re welcome!